
Using PrintWayy in the simplest way is based on monitoring printers and is focused on 3 pillars:
- Customer registration and key generation;
- PrintWayy Client installation;
- Display of the counters.
Running the installer
After downloading the PrintWayy Client tool and registering your client on the PrintWayy website, it's time to actually install the Printwayy Client tool into your environment.
When you run the PrintWayy installer the following window should appear:

Choosing the type of Communication and Setting up Proxy or e-mail
When you click Next, the screen for choosing the form of communication between the PrintWayy Client and our server will be displayed. The default communication is via Web Services.
For communication via Web Services, it is possible to inform the proxy data, if the environment where the installation is being carried out has this type of configuration. Just mark the option Use proxy server and fill in the fields that will be displayed.
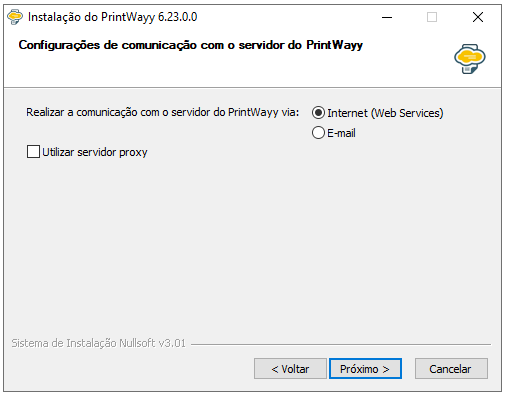
For restricted environments, which do not allow communication via internet (Web Services), it is possible to exchange data via e-mail. Just select the option Communication via e-mail and fill in the data according to your e-mail server.
Tip: if you choose to communicate via e-mail, it is important to have a specific account for this purpose, as it will generate a considerable amount of e-mail.
Attention! If the e-mail option is chosen as the form of data exchange, the validation process of the installation key may take from 3 to 5 minutes to complete.
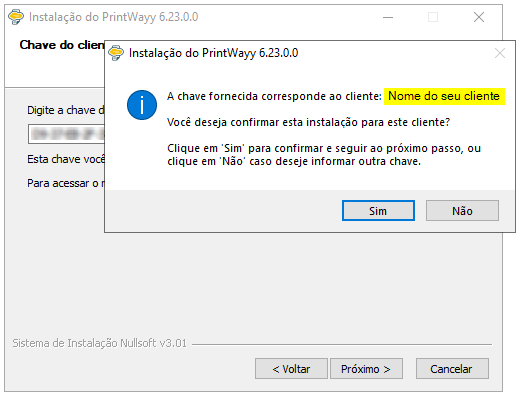
Use of the key
At this point you will need to use the key generated after the Client's registration has been completed.

Attention! After clicking "Next" should appear the name of the registered customer, check that it is correct and if all is right, simply confirm the installation.
Finishing the installation and accessing PrintWayy Client
After confirming the path from where PrintWayy Client should be installed and waiting for it to finish the process, simply complete the installation and log in.
The authentication screen will appear and the default password for the tool is: monitoramento
Monitoring a printer
When you open PrintWayy Client for the first time, the application may already display the available printers on the network.
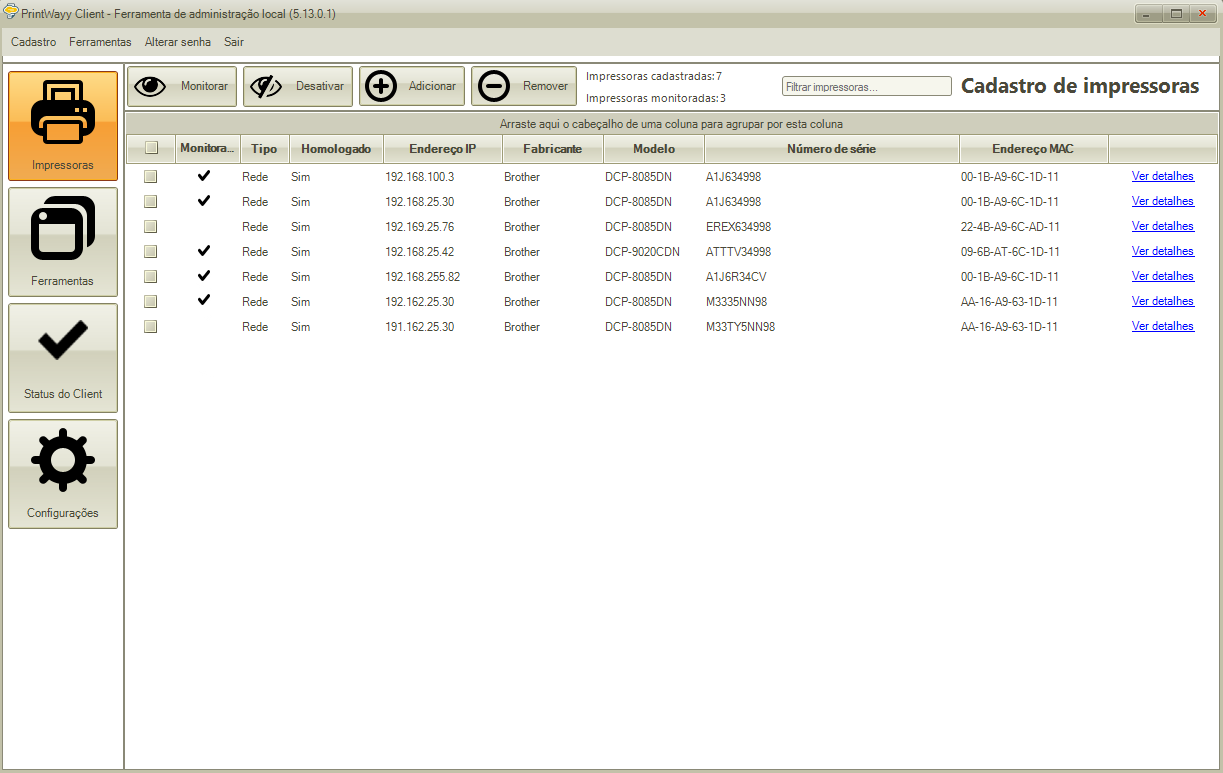
Note: All printers that are monitored in the system will be "checked" in the "Monitored" column.
Buttons and functionalities
You can make a full or partial selection of printers by clicking on the first column of the grid, which is represented by the boxes. After the selection it is possible to perform two mass actions:

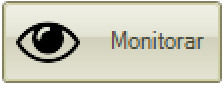
Monitor
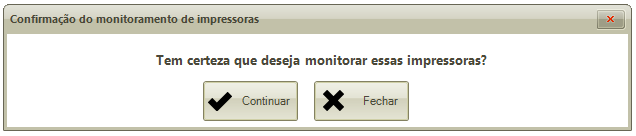
When you mass select the printers and click "Monitor" the confirmation screen will appear:
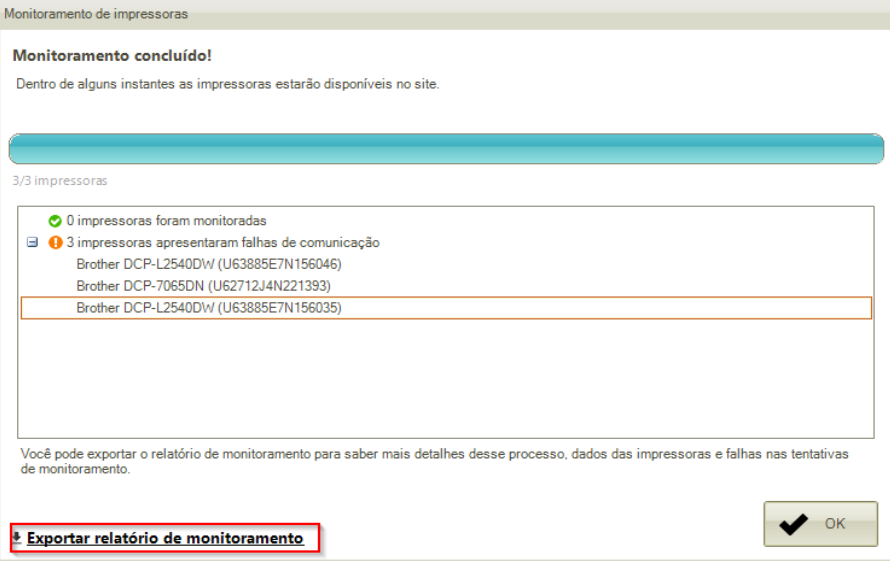
By clicking Continue the following screen will appear detailing the situation of each device selected for monitoring, also having the possibility to Export the information from the monitored printers.
Deactivate
By Disabling Printer Monitoring a confirmation screen will appear. By disabling monitored printers, they will have their monitoring disabled on the site.

Add
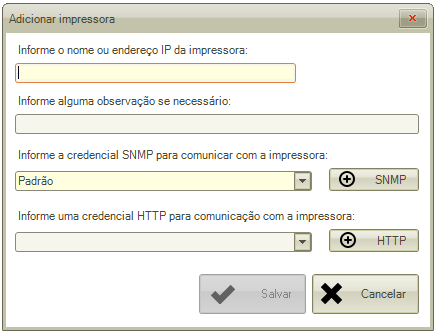
It is also possible to manually add by IP of a specific printer using the "Add" button.

The Add Printer is simple and just have the name or IP of the machine and click "Save" for the PW Client to search the specified equipment.
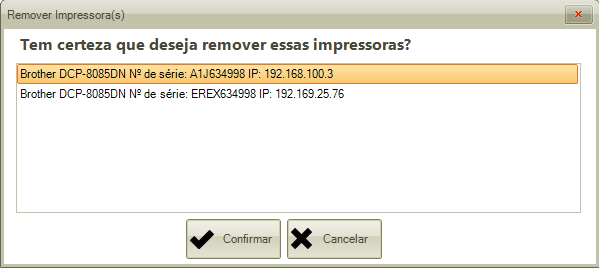
Remove
The removal action can be done en masse for both printers already monitored and for printers that will not be monitored and only appeared in the grid because they are on the same network.
By making your selection and clicking Remove a confirmation screen will appear. By removing monitored printers, they will have their monitoring disabled on the site.
Selling Printer Details
By double-clicking on a printer or clicking on "View Details", the following screen will appear:

After checking the series, model, manufacturer and the counters themselves, just click "Monitor" and then, this information will be forwarded to our server and later appear on the site where you can manage your costs, contracts and supplies.
New Printers
If you don't see any printers, don't worry, PrintWayy Client scans the network every 6 hours for new printers, if it finds any, they will be sent directly to the New Printers menu in the system's web environment.
To learn more about New Printers click here.
To go to the third part of this guide and learn where to view the data from the newly monitored printer click here.
To return to the Getting Started menu click here.