
Within the options on the Settings screen, you can edit your user account data, as well as your company's address and department information.
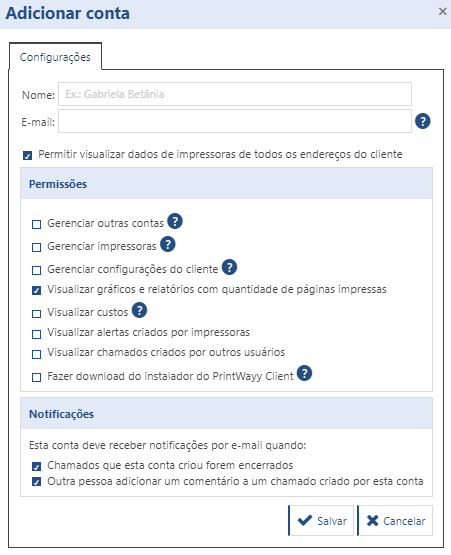
User Accounts
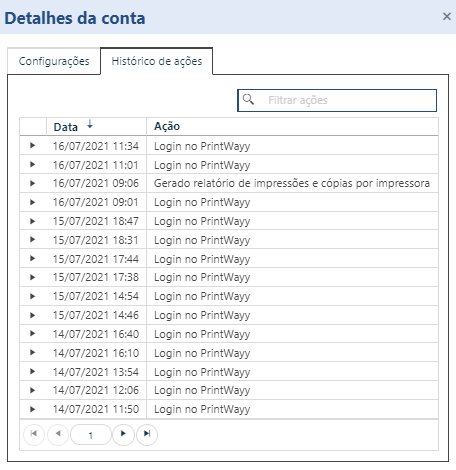
In this screen you can create users, view details, edit, delete and resend passwords, and you can deactivate or activate an account you have already created.

The user settings allow you to set access privileges, enable or disable notifications, and also view the user's action history.
Addresses and Departments
By accessing the Addresses and Departments item, under Settings, you can change the registered data, add or remove information.
You can edit the following items:
- Main address data;
- Add, edit and remove departments to the main address;
- Add, edit and remove other addresses.
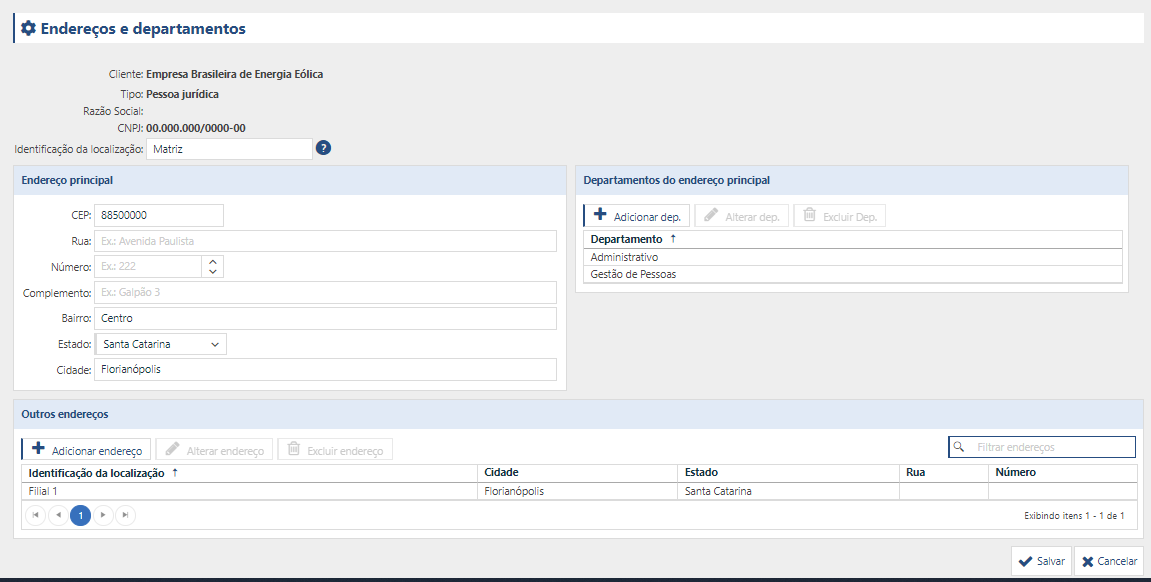
Departments
You can manage the company's departments via the Departments frame in the main address.
The registered departments can be associated with the printers, so that there is a separation of the location of each monitored printer. To add a new department
- Click Add dep;
- In the window that appears, enter the name of the department;
- Click Save.
To change the data of a registered department, double-click on the department or select the department in the Select column and then click Change dep.
To remove a department, select the department in the Select column and then click Remove dep.
Other addresses
You can add one or more new addresses. These addresses can represent company branches, for example, and can be associated with registered printers. To add additional addresses:
- Click "Add Address" in the Other Addresses frame. The screen below will appear:
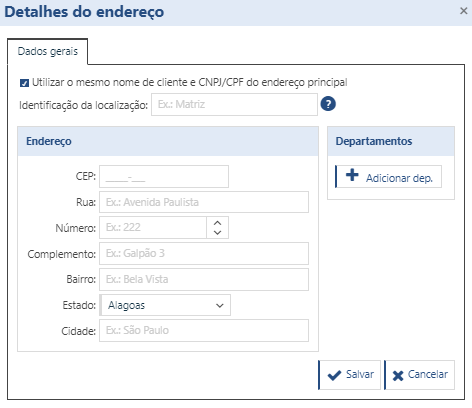
- With the option "Use the same customer name and CPF/CNPJ of the main address" checked, it will be assumed that this new address has the same general data as the main address. If this is not the case, you must deselect the option and fill in the fields for customer name and CPF/CNPJ that will be displayed;
- Enter an identification for the new address (Branch 01, for example), fill in the data, and also inform the data for contacts and specific departments, in the same way as is done for the main register;
- After filling out the fields, click on "Save" to register the new address.
To change the data of a registered address, double click on the address or mark the address in the "Select" column and then click "Change address".
To remove an address, check the address in the "Select" column and then click "Remove Address".